Creating Vector Graphics with SVG
Sam Reed ▪ June 1st, 2023

Scalable Vector Graphics (SVG) is a versatile tool for creating resolution-independent vector graphics that can be scaled to any size without quality loss. This makes SVG ideal for logos, icons, and other graphics that need to appear sharp at any size. In this post, we'll look into the basics of creating vector graphics with SVG, focusing on constructing various shapes.
What is SVG?
SVG, or Scalable Vector Graphics, is an XML-based vector image format for two-dimensional graphics, with support for interactivity and animation. Because SVG documents are XML, they can be created and edited with any text editor. However, specialized SVG-based graphics editors, such as Adobe Illustrator or Inkscape, can provide a more user-friendly interface and advanced features.
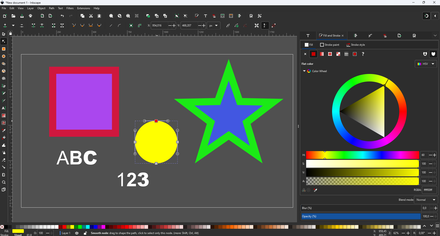 Inkscape in action
Creating Basic Shapes with SVG
SVG allows for the creation of various basic shapes using predefined elements. Below are examples of how you can create these shapes:
Rectangle (<rect>)
The <rect> element is used to create rectangles and squares. You can specify the position with x and y, and the size with width and height. Additionally, you can use rx and ry to create rounded corners.
Example of SVG code for a rectangle with rounded corners:
Circle (<circle>)
The <circle> element is used to create circles. The position of the center of the circle is specified with cx and cy, and the radius with r.
Example of SVG code for a circle:
Ellipse (<ellipse>)
The <ellipse> element is used to create ellipses. The position of the center of the ellipse is specified with cx and cy, and the radii with rx (horizontal radius) and ry (vertical radius).
Example of SVG code for an ellipse:
Line (<line>)
The <line> element is used to create straight lines. The start of the line is specified with x1 and y1, and the end of the line with x2 and y2.
Example of SVG code for a line:
Polygon (<polygon>)
The <polygon> element is used to create polygons. The points attribute holds the coordinates for each corner of the polygon.
Example of SVG code for a polygon:
Adding Text to SVG Images
You can add text to SVG images using the <text> element.
In this example, the <text> element is used to insert text into the SVG image. The x and y attributes define the starting point of the text, and the style attribute is used to specify the font, font size, and fill color.
Creating Complex Shapes with SVG Paths
For more complex shapes, SVG provides the <path> element. The d attribute of the <path> element contains a series of commands and parameters used by the browser to draw the path.
A complex image like this is comprised of multiple complex paths, such as the following:
For more details about SVG paths, see the Mastering SVG Paths post.
Conclusion
SVG opens a world of possibilities for creating intricate, scalable graphics. By mastering the basic SVG shapes, you're well on your way to becoming proficient in SVG. In future posts, we'll look deeper into the more advanced aspects of SVG, including gradients, patterns, and animations. Stay tuned!

